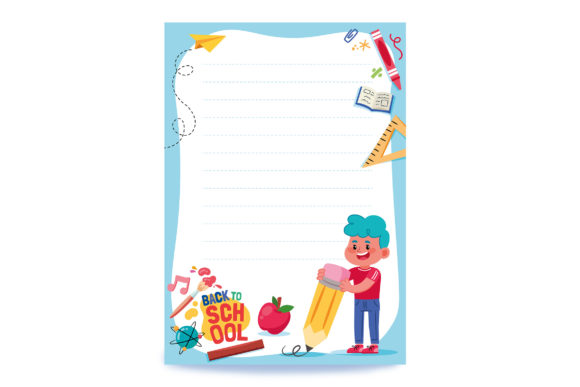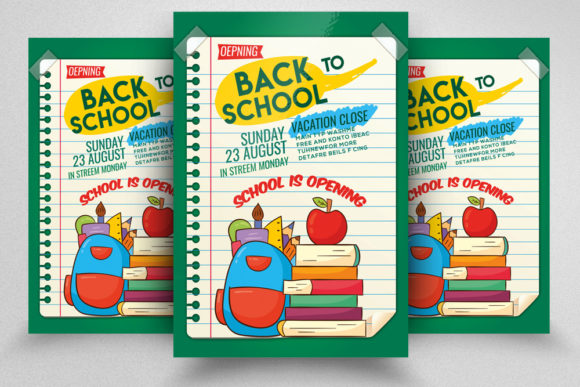
Back to School Flyer Poster Design Toolkit
Putting together promotional materials for the back-to-school season often feels like a race against time. Whether you are marketing a tutoring service, promoting a supply sale, or creating a classroom welcome sheet, the quality of your flyer can shape first impressions long before anyone reads a single word. A well-prepared design file saves you from starting from scratch and helps you deliver polished results even when deadlines are tight. Understanding what goes into a solid template—like the Back to School Flyer Poster with its professional specifications—can make the difference between a rushed project and a confident delivery.
Built on CMYK Color Mode for Reliable Print Results
One of the most overlooked details in flyer design is color space. Many digital designs rely on RGB, which displays vibrant hues on screens but often shifts noticeably when printed. The Back to School Flyer Poster uses CMYK color mode, aligning the file with commercial printing standards from the start. This means the rich blue of a school banner or the warm yellow of a bus icon will reproduce consistently on paper, without unexpected dullness or muddy tones.
If you have ever sent a file to a print shop only to receive a proof that looks completely different from your monitor, you understand the frustration. Starting with CMYK removes that guesswork. For educators printing class announcements, small business owners distributing event flyers, or marketers ordering bulk batches, this color accuracy builds trust with your audience. It also eliminates the need to manually convert color modes later, saving a step during an already busy workflow.
300 DPI Resolution and 8.5×11 Size with Bleed
Resolution directly affects how your flyer feels in someone’s hand. A low-resolution file can appear pixelated or soft, while a 300 DPI (dots per inch) file delivers sharp text and crisp imagery. The Back to School Flyer Poster specifies 300 DPI resolution, which is the standard for professional printing. This detail matters most when fine details are involved—think small contact information, barcodes for event registration, or subtle gradients in a school logo.
The 8.5×11 inch size with a 0.25 inch bleed is another practical choice. This is the classic letter-sized format, fitting standard frames, bulletin boards, and mailing envelopes. The bleed ensures that any background color or image extends slightly beyond the trim line, preventing white edges after cutting. For anyone who has ever struggled to align a design to a sheet of paper, these specifications reduce the risk of misalignment and reprints. Freelancers and bloggers who design promotional content for clients will find this format widely accepted by print shops, making it a reliable choice for both digital previews and physical distribution.
Editable Text Layers and Smart Object Layers
A template’s flexibility often determines whether it becomes a time-saver or a bottleneck. The Back to School Flyer Poster includes editable text layers, allowing you to change headlines, subheadings, body copy, and call-to-action buttons without affecting the rest of the design. This is particularly valuable when you need to create multiple versions of the same flyer—for different grade levels, locations, or dates. Instead of rebuilding the layout each time, you simply update the text.
The inclusion of Smart Object Layers serves a different but equally important purpose. Smart Objects allow you to insert images—such as a classroom photo, a product shot, or a student portrait—while preserving the original image quality. The design automatically scales and masks the image within the intended frame. If you later need to replace the image, you can do so without breaking the layer structure. This feature is a practical advantage for photographers, hobbyists, and small business owners who may not have advanced Photoshop skills but still need professional-looking results.
Well-Organized Layers and Professional File Structure
Layer organization might seem like a behind-the-scenes detail, but it directly affects how quickly you can work. The Back to School Flyer Poster is built with well-organized layers, grouped logically so you can find exactly what you need without hunting through dozens of unnamed items. This structure benefits anyone who collaborates with others—if a colleague or client needs to make a quick edit, they can navigate the file without confusion.
The file is described as having a professional and clean appearance, which means the initial design is balanced, readable, and visually appropriate for school-related messaging. You are not inheriting clutter or experimental elements that need to be undone. Instead, you start with a layout that already respects spacing, contrast, and hierarchy. For marketers and publishers who produce seasonal content at scale, this reduces the time spent on layout refinement and frees up energy for content strategy and messaging.
Free Fonts Used and File Format Considerations
Font licensing can be a hidden hassle. Some templates rely on paid typefaces that require separate purchases, adding both cost and complexity. The Back to School Flyer Poster uses free fonts, which can typically be downloaded from reputable sources without additional fees. This is especially helpful for freelancers and educators operating on limited budgets. You can replicate the same look across multiple projects without tracking licenses or worrying about compliance.
The file is delivered as 1 PSD file, the native Photoshop format, accompanied by an Instruction.txt help file. PSD preserves all layers, adjustments, and smart objects exactly as intended. If you use Photoshop regularly, this format keeps the design fully editable. The instruction file offers guidance on installation, font linking, and basic edits. For those less familiar with layered templates, this documentation reduces the learning curve and helps avoid common mistakes like accidentally flattening the file or misplacing a layer.
Who Benefits Most and Practical Use Cases
A template with these specifications is not a one-size-fits-all solution, but it does serve a wide range of users effectively. Teachers and educators can adapt it for classroom schedules, open house announcements, or extracurricular sign-ups. The clean layout and print-ready settings mean less time fiddling with software and more time focusing on students. Small business owners running seasonal sales or promotions can produce consistent materials that match their brand without needing a graphic design degree.
Marketers and bloggers who manage multiple content channels can use the flyer as a base for social media graphics or email attachments, since the letter size scales well with minor adjustments. Freelancers and hobbyists who take on occasional print projects will appreciate the reliable settings and organized layers, especially when working under client feedback loops that require fast revisions.
Even publishers and entrepreneurs who distribute printed materials at community events or networking meetups can benefit from a template that arrives ready to print. You avoid the hidden costs of reprints due to color mismatch or resolution problems. The file’s structure also makes it easy to repurpose for other seasons—maybe with a few color adjustments and new imagery, the same layout works for a spring fundraiser or a winter program guide.
Realistic Limitations and Fit Considerations
No template covers every scenario, and it is worth noting a few considerations. If you work exclusively in software other than Photoshop—such as GIMP, Affinity Photo, or Canva—the PSD format may require conversion or may not be fully compatible with all features. The smart objects and layer styles are optimized for Photoshop, so users on other platforms should verify compatibility before purchasing.
Additionally, while free fonts remove one barrier, you still need to download and install them. The instruction file guides you through this, but it is an extra step. If you prefer using typefaces from your own library, you can swap them in, though you may need to adjust spacing or sizing. The template provides a strong foundation, but final refinement depends on your specific content and preferences.
Recommendations for Best Results
To get the most out of the Back to School Flyer Poster, start by reviewing the instruction file before opening the PSD. This gives you a clear picture of what each font is and where the smart objects sit. Replace placeholder text and images with your own early in the process, then step back to assess overall balance. Because the layers are well organized, you can experiment with color variations or background changes without fear of breaking the design.
If you are printing through a commercial service, confirm that they accept CMYK, 300 DPI, and 0.25 inch bleed. Most professional printers do, but double-checking avoids delays. For those printing at home, the same settings ensure your inkjet or laser output looks as sharp as possible. Consider ordering a single proof copy before committing to a large run, especially if you have customized the layout heavily.
The file is designed to be straightforward, but its real value emerges when you treat it as a starting point rather than a finished product. Add your unique headlines, choose imagery that reflects your audience, and adjust the call-to-action to match your goals. The technical specifications handle the printing side, leaving you free to focus on message and tone.
Whether you are a veteran marketer, a classroom teacher, or an entrepreneur launching a back-to-school campaign, this template offers a structure that respects your time and your audience’s expectations. The combination of CMYK, 300 DPI, exact sizing with bleed, editable text, smart objects, and organized layers creates a reliable base. When you work with a file that already accounts for print production details, you can shift your attention to what really matters: connecting with the people who will see your flyer and giving them a reason to read, respond, and remember.