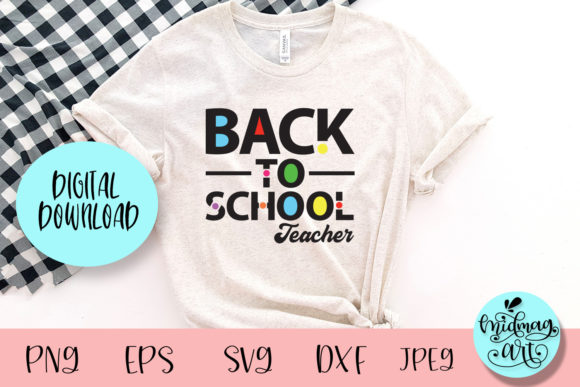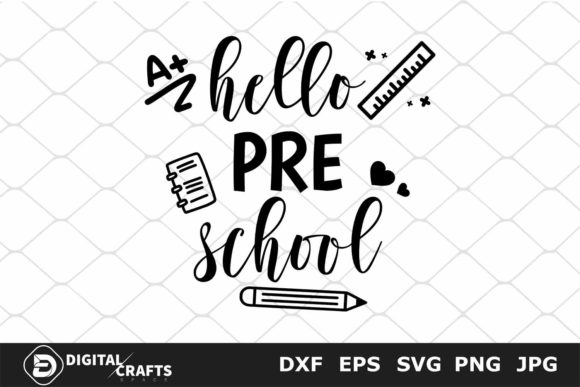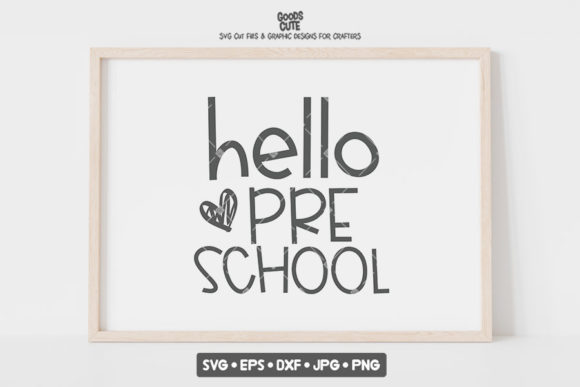
Getting the Most from Your Back to School Hello Preschool SVG: A Practical Guide
For many parents, caregivers, and small business owners, the start of the school year brings a flurry of creative projects. You might be preparing a special shirt for your little one, designing a mug for a teacher gift, or even building a small product line for a local craft fair. When you come across a Back to School Hello Preschool SVG set, it can feel like the perfect solution. But how you use that file makes all the difference between a polished result and a frustrating afternoon of wasted materials.
This set typically includes an SVG, EPS, DXF, JPG, and PNG file, all optimized as cut files for vinyl car decals as well as print-and-cut files. The PNG and JPG versions are supplied at 300 DPI, which means they are also suitable for sublimation onto mugs, coasters, and other substrates. While the possibilities are broad, the details of how you prepare and apply these files often trip people up. Here is a straightforward look at what to watch out for and how to get the outcome you actually want.
Understanding What You Are Actually Working With
A common misunderstanding is that a single file type will work for every application. The SVG inside the zip folder is a vector file, which means it scales to any size without losing quality. That is ideal for cutting vinyl with a machine like a Cricut or Silhouette. The EPS and DXF are also vector formats, intended for different software ecosystems. The JPG and PNG are raster images: they are made of pixels and work well for printing, but they do not scale up cleanly beyond their original dimensions.
Many people open the PNG, enlarge it beyond its safe limits, and then wonder why their mug print looks blurry or pixelated. The better approach is to use the SVG for any cut or resizeable project. Keep the 300 DPI PNG for direct printing at its intended size, and avoid stretching it in your design software. If you need a larger print, recreate your layout using the vector file so the edges stay crisp.
Mistake Number One: Ignoring the Cut Line vs. Print Layer Setup
One of the most frequent errors happens when someone attempts to use a cut file the same way they would a print-and-cut file. The Back to School Hello Preschool SVG is optimized as a cut file for vinyl car decals, which means the vector path is meant to guide a blade around the shape. If you load it into your design software without separating the cut line from any internal design elements, the machine might cut every single line rather than just the outer contour.
If you intend to sublimate the design onto a mug, you will use the PNG or JPG, not the cut path. But if you want to create a layered vinyl decal, you need to work with the SVG and assign each color or element to a separate cut layer. The mistake of treating the whole design as a single cut causes misalignment, wasted vinyl, and a lot of unnecessary weeding. Take the time to ungroup the file in your software, check each layer, and make sure your machine is set to cut only the intended lines.
Mistake Number Two: Overlooking Bleed and Margins for Print Projects
When you print the design onto sublimation paper and then press it onto a mug, the paper needs to extend slightly beyond the edges of the item to ensure full coverage. Many users assume the file is ready to go as is, but the supplied JPG and PNG generally do not include printer bleed. If you place the image exactly at the edge of your print area, any slight misalignment during the pressing step will leave an unprinted border.
Before you commit to a final print, duplicate the design in your editing software and add a small amount of extra background or shadow around the edges. This gives you a margin of error during transfer. For a mug, a bleed of 3 to 5 millimeters on each side is usually sufficient. Check the dimensions of your blank and verify that your printed image is slightly larger than the pressing area. Skipping this step is one of the quickest ways to end up with a mug that looks incomplete.
Mistake Number Three: Choosing the Wrong Vinyl or Transfer Tape
Even with a perfectly prepared SVG, the finished decal will only look as good as the materials you pair it with. Permanent vinyl is not all the same. Some vinyl is formulated for outdoor use and can withstand weather and car washes. Other vinyl is intended for indoor applications like wall decals or laptop stickers. The Back to School Hello Preschool SVG can be cut for a car decal, but if you pick a craft vinyl that is not UV-resistant, the colors will fade within weeks.
Similarly, transfer tape matters. High-tack tape is necessary for intricate designs with thin lines or small letters, while low-tack tape works for simpler shapes. If you use the wrong tape, you risk losing pieces of the design during the transfer step. It is worth testing a small cut on a scrap piece of vinyl to see how the tape interacts with the material before you commit to the final project. This small check saves you from the frustration of a decal that refuses to release from the backing.
Mistake Number Four: Skipping a Test Cut and Print
It is tempting to load the SVG into your machine, hit go, and assume everything will work perfectly. But every batch of vinyl, every blade, and every cutting mat behaves a little differently. A blade that is slightly dull or a pressure setting that is too light will cut through the vinyl inconsistently. You might not notice until you try to weed the excess material and the fine details tear away.
Before you cut the final version, run a small test cut on a corner of the same vinyl you plan to use. Check that the blade cuts all the way through the vinyl without cutting too deeply into the backing sheet. For print-and-cut projects, print a test sheet on plain paper first, then check that the registration marks scan correctly. Adjust your settings based on the test rather than guessing. This habit alone will raise the quality of your finished decals and reduce material waste.
Mistake Number Five: Not Checking Software Compatibility
The zip file contains four vector formats and two raster formats, which covers most popular design programs. Still, compatibility issues arise when someone tries to open the EPS or DXF in a program that only supports SVG, or vice versa. For example, older versions of some free software may not import the SVG correctly, causing distorted shapes or missing elements.
If you are using Cricut Design Space, upload the SVG directly. If you are working in Silhouette Studio, the DXF or SVG both work, but SVG often preserves layer structure better. For Adobe Illustrator or Inkscape, any of the vector files should open cleanly. Avoid converting the file type through an online converter unless absolutely necessary, because each conversion can introduce artifacts or alter the paths. Stick with the original file from the zip and choose the format that matches your software exactly. This preserves the intended design and saves you troubleshooting time.
Mistake Number Six: Overcomplicating the Sublimation Process
Sublimation printing onto a mug or coaster using the supplied PNG is straightforward, but it requires attention to temperature, pressure, and time. A common misstep is assuming that a longer press equals a better transfer. In reality, over-pressing can cause the colors to ghost, blur, or yellow the substrate. Each blank material has a recommended time and temperature range, and those parameters are not optional.
Before you press the final mug, do a small test transfer on a scrap piece of sublimation paper or a practice blank. Document the settings that gave you the brightest colors and the sharpest edges. Also, note that the paper must be taped securely in place to prevent movement during pressing. A shift of even a millimeter can ruin the alignment, especially with text like "Hello Preschool." The extra minute you spend securing the paper is much less frustrating than starting over from scratch.
Mistake Number Seven: Forgetting to Mirror the Design
This oversight is almost a rite of passage in sublimation, but it is worth flagging again. When you print the design onto sublimation paper, it must be mirrored horizontally before pressing. If you print it as is and press it onto a mug, the text and images will appear reversed. The same applies to any heat-transfer vinyl project where the design is applied face down.
Check your software settings before you hit print. Some programs have a mirror or flip option. Others require you to manually rotate the image. It is an easy step to forget, but catching it before printing saves you a whole blank. Make it a habit to look at the preview and verify that the text reads backward on the screen if you are using transfer paper. This simple check eliminates one of the most preventable mistakes.
What to Check Before You Download or Buy
Before you commit to any SVG set, look at the file list carefully. This particular pack includes SVG, EPS, DXF, JPG, and PNG, all at 300 DPI. That gives you flexibility for both cutting and printing. Confirm that the design is sized appropriately for your intended use. If the artwork is very small, you may need to scale it up in your software, and scaling can impact line thickness. Check the preview images for any fine details that might be difficult to weed or that may not sublimate well at small sizes.
Also, read the listing or description for any usage restrictions. Some SVG files are for personal use only, while others include a commercial license. If you plan to sell finished products, make sure the license permits that. This is not just a legal detail: it also protects you from disputes down the road. A clear understanding of what you can and cannot do with the file keeps your projects and your small business running smoothly.
Making the File Work for Your Specific Project
The beauty of a well-prepared vector file like this one is that it can adapt to many applications. A car decal requires durable outdoor vinyl and a clean transfer. A mug requires sublimation settings that match the coating of the blank. A shirt or tote bag using heat-transfer vinyl needs a different pressing time and temperature. None of these are difficult, but each demands a small adjustment in your process.
When you prepare your design, think about the end use before you open the file. Decide whether you will cut, print, or both. Then choose the appropriate file from the zip, set up your workspace accordingly, and test on a scrap piece. This approach turns a generic design into a customized product that looks intentional rather than rushed. The few extra minutes spent on preparation pay back in consistency and quality every time.
Whether you are decorating a classroom cubby, making a matching set for a sibling, or building inventory for a seasonal sale, the Back to School Hello Preschool SVG gives you a solid starting point. The file set is versatile, but it rewards careful preparation. Pay attention to your material choices, test your settings, and treat each step as part of the craft rather than a hurdle. The result will be a project you are happy to hand over, gift, or sell.